Your first landmark pass
Generate a palette, paint half a head with it, mirror it to the other side, find what you missed, and save the result. Ten minutes, one mesh.
Open a scene with a symmetric polygon mesh in it — a head is the obvious case — and open the tool:
1. Generate a palette
Go to the Create page. This is where landmark colours come from; you never have to pick them one at a time unless you want to.
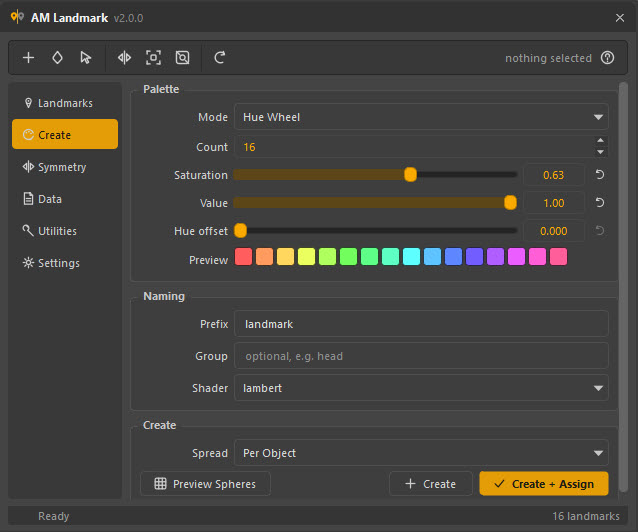
Mode decides how the colours are chosen; the row of chips under the sliders is exactly what will be created.
Set:
| Field | Value | Why |
|---|---|---|
| Mode | Distinct |
Golden-ratio spacing: the first N colours stay well separated for every N, so adding a seventeenth landmark later does not force you to recolour the first sixteen. |
| Count | 8 |
Start small. You can always create more. |
| Prefix | head |
Shaders are named head_01, head_02, … |
| Group | head |
A label you can filter the list by later. |
| Shader | surfaceShader |
Flat and unlit, so the viewport colour is exactly the swatch colour. |
Press Create. Eight landmarks appear in the list on the Landmarks page.
Just want to see it?
Preview Spheres builds a row of spheres wearing the palette so you can look at the colours on real geometry. They are rebuilt under one group every time, and Utilities → Delete Previews removes them.
2. Assign the first region
Select some faces on one side of the mesh — the brow, say — then in the
Landmarks list click head_01 and press the droplet button in the toolbar
(Assign to Selection).
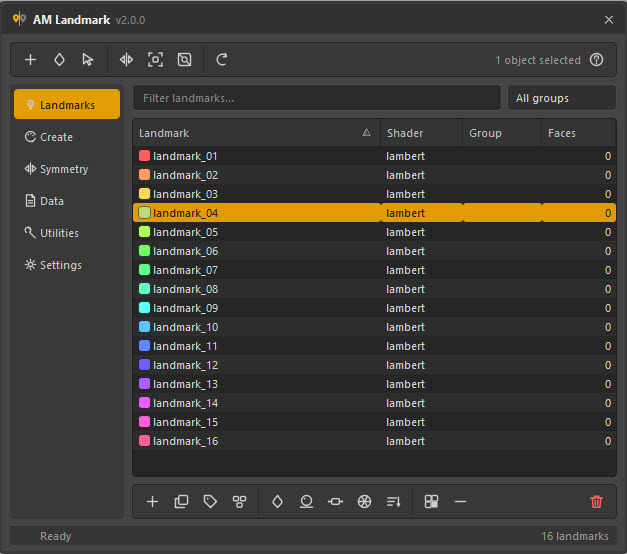
The Faces column counts what each landmark is wearing. It updates as soon as the assignment lands.
Repeat for the regions you care about. Two things make this faster:
- Set Settings → Clicking a landmark selects → Nothing while you work this way. Then clicking a row in the list never disturbs the faces you have picked in the viewport, so you can pick once and try several landmarks on it.
- Vertex and edge selections are converted to the faces they touch, so an edge loop selection is a legitimate way to mark a strip.
3. Mirror it to the other side
You have marked one side. Go to the Symmetry page.
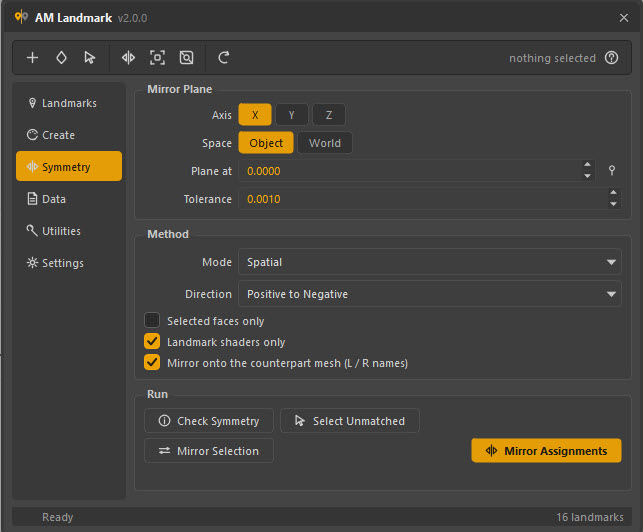
Leave the defaults — Axis X, Space Object, Mode Spatial, Direction Positive to Negative — and press Check Symmetry first. It reports how many faces found a partner:
headShape: 1 984 of 1 984 faces matched
If that number is short, do not mirror yet — go and read Checking and fixing; a mismatch here means the mirror would silently skip those faces.
When the count is clean, press Mirror Assignments. Every landmark on the positive side is now on the negative side too.
Why check first
A mirror that quietly does 99 % of the job is the worst possible outcome: the model looks right at a glance and the missing 1 % surfaces three days later, in somebody else's shot. Checking takes a second and turns a silent failure into a number.
4. Find what you missed
Go to Utilities and press Audit with nothing selected (which audits the whole scene) or with your mesh selected.
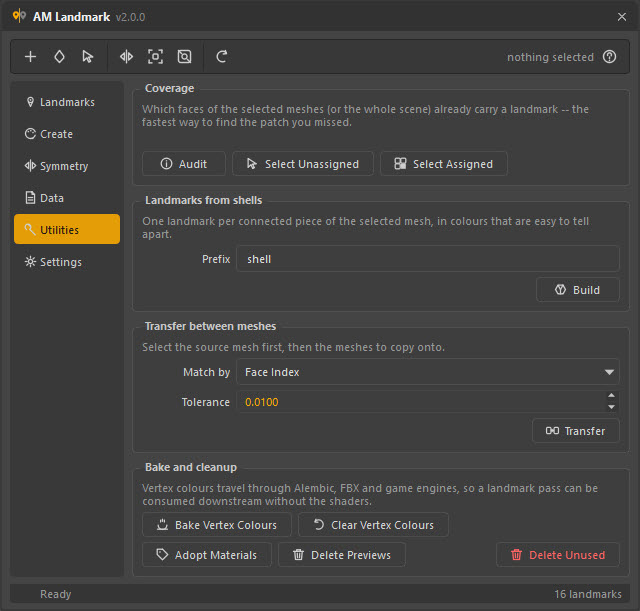
You get a count, per mesh:
3 214 of 3 968 faces carry a landmark (81.0 %)754 faces have no assignment at all
Select Unassigned puts exactly those faces in your viewport selection. Mark them, or decide they are meant to be bare, and move on.
5. Save the pass
Go to Data. Leave Store UV samples and Store position samples on — they are what lets this file load onto a mesh that gets rebuilt later — and press Save All….
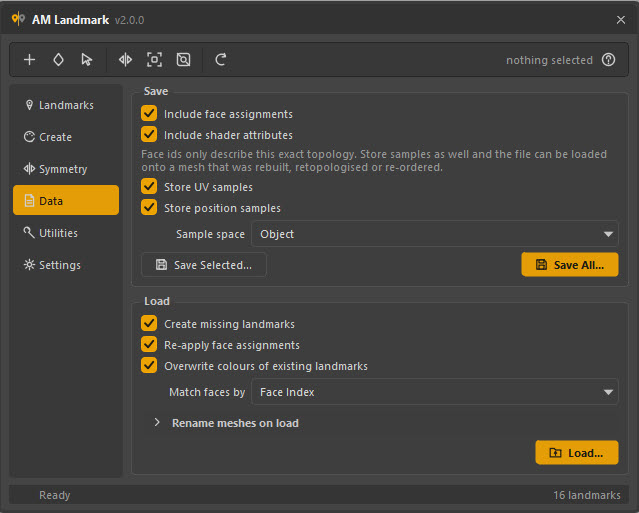
That file now carries every landmark's name, colour, group, notes, shader type and face assignment. In the next scene, Load… brings the whole pass back.
What to read next
-
The landmark list
Everything the list and its right-click menu can do — rename, group, select faces, isolate, clear, delete.
-
Palettes
All five generators, what each is for, and how to hand a palette out across a selection in one go.
-
Symmetry in depth
Three ways to find the face on the other side, and which one to reach for when the mesh is posed.
-
Loading onto other meshes
Rename meshes on load, and the four ways a stored assignment can find its faces again.