Palettes
Landmark colours are generated, not picked one at a time. Five generators, previewed live, and a spread mode that hands a whole palette out in one press.
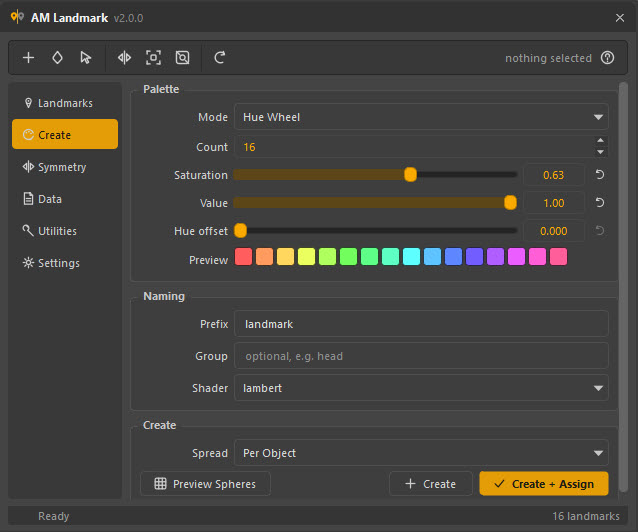
The row of chips under the sliders is exactly what pressing Create will make. It updates as you drag.
The generators
Mode decides how the colours are chosen. The controls change with it — a page that showed every control of every mode at once would make you work out which three of the eight matter, and the answer changes with the mode.
| Mode | Chooses | Reach for it when |
|---|---|---|
| Hue Wheel | N hues spaced evenly around the wheel. | You know how many landmarks you want and want them maximally even. |
| Distinct | Hues stepped by the golden ratio. | You do not know the final count. |
| Ramp | An interpolation between two colours you pick. | The regions are a sequence — vertebrae, finger joints, LOD bands. |
| Harmony | A scheme built around one base colour. | The pass has to sit next to something, or go in a presentation. |
| Random | Random, but rejected until far enough apart. | You just need N colours and do not care which. |
Hue Wheel
Even spacing: with a count of 6 you get red, yellow, green, cyan, blue, magenta. Hue offset rotates the whole set, which is how you keep two neighbouring assets from coming out the same colours.
Distinct
Successive hues are stepped by the golden-ratio conjugate, which lands each new colour as far as possible from every hue already used. The useful property is that the first N of the sequence are well spread for every N:
So adding a ninth landmark to a set of eight does not force you to recolour the first eight. Saturation and value are nudged on every second and third entry as well, because pure hue rotation starts to repeat visually past about a dozen swatches on a mid-grey viewport.
Why this is the default for shells
Landmarks from shells does not know how many pieces a mesh has until it looks, so it needs a generator whose answer for 7 is not thrown away when the answer turns out to be 23.
Ramp
Interpolates between Start and End. Blend in decides how:
| Space | Red → blue travels through | Use for |
|---|---|---|
| HSV | magenta — saturation is preserved | Anything where the middle should stay colourful |
| RGB | grey — the literal channel blend | Matching another tool that blends this way |
| Linear RGB | grey, but weighted the way light adds up | Matching what a renderer would do |
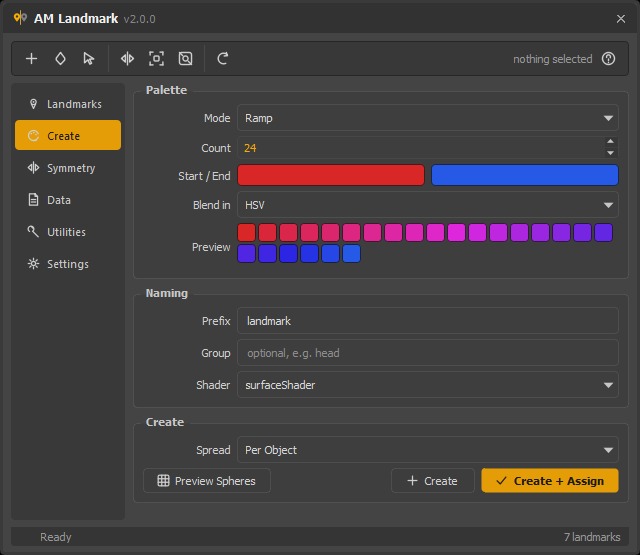
Twenty-four steps, HSV: the middle stays saturated instead of washing out.
A greyscale endpoint has no hue of its own, so it borrows the other end's — otherwise white → red would sweep the entire wheel on its way.
Harmony
Builds a scheme around Start. The base colour is always first, so switching scheme keeps the palette recognisable.
| Scheme | Anchors |
|---|---|
| Complementary | The base and its opposite |
| Analogous | Neighbours, 30° apart, closest first |
| Triadic | Three, 120° apart |
| Split Complementary | The base and the two hues either side of its opposite |
| Tetradic | Four, 90° apart |
| Monochromatic | One hue, a ladder of saturation and value |
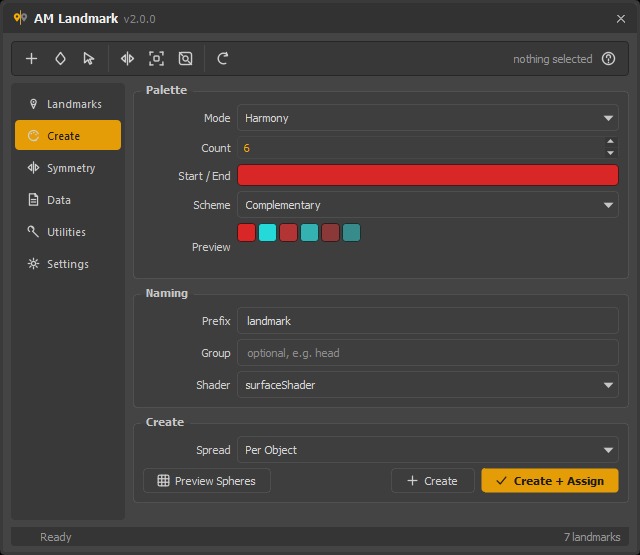
Past the anchors the generator walks value and saturation down, so a nine-swatch triad is nine colours rather than the same three repeated three times.
Random
Random hues with jittered saturation and value — but each candidate is rejected and re-rolled until it clears a minimum perceptual distance from every colour already chosen. Naive randomness hands out two oranges in a row surprisingly often, which for a landmark set is worse than useless.
Seed makes it repeatable: the same seed always produces the same palette, so you can regenerate the identical set tomorrow. The dice button rolls a new one.
The preview
The chips under the sliders are the actual colours the generator will produce. Hover one for its number and hex; click it to put that hex in the status bar.
Naming
| Field | Effect |
|---|---|
| Prefix | Shaders are named prefix_01, prefix_02, … Illegal characters are replaced, so head mark! becomes head_mark. |
| Group | Written onto every landmark created, and what the list's group filter uses. Optional. |
| Shader | The node type to create. See Shaders. |
Re-running Create with the same prefix updates the landmarks it made last time rather than creating a second set beside them.
Why re-generation reuses names
Creating a fresh set every time would leave landmark_01, landmark_011,
landmark_012 behind it — one orphaned shader per experiment, all of them
still in the scene, none of them assigned to anything. Tuning a palette is
exactly the thing you do fifteen times in a row, so it must not litter.
Creating and assigning
| Button | Does |
|---|---|
| Create | Makes the shaders. Assigns nothing. |
| Create + Assign | Makes them and hands them out over the current selection, using Spread. |
| Preview Spheres | Makes them and builds a row of spheres wearing them, under one group, so you can judge the palette on real geometry. |
Spread
| Mode | Hands out |
|---|---|
| Per Object | One landmark per selected mesh, in order. |
| Per Shell | One landmark per connected piece of each mesh — the fast way to colour an asset that is already split into parts. |
| All | Every target gets the first landmark. A plain assign. |
Both Per Object and Per Shell cycle the palette if there are more targets than colours.
Preview spheres are disposable
They are rebuilt from scratch under AM_landmark_preview_grp every time, so
they never accumulate, and Utilities → Delete Previews removes the group
entirely. They are ordinary polygon spheres — do not leave them in a
published scene.
Recolouring what already exists
You do not have to get the palette right before you start. The palette button in the list's row of actions re-runs whatever the Create page is currently set to across the landmarks you have already made, keeping their names, groups and assignments.