Layers
Keep different kinds of work apart — the lesson on one layer, today's notes on another — and hide, fade or delete one without touching the rest.
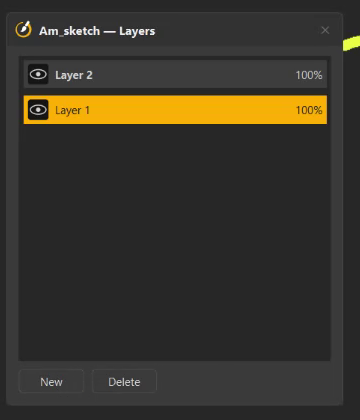
The Layers window
Click the Layers slot to open Am_sketch — Layers. The top layer is listed first.
| To | Do this |
|---|---|
| Make a new layer | New — it is added on top as Layer N and becomes the active layer. |
| Choose the active layer | Click its row. The active layer is in bold; new strokes, shapes and text go there. |
| Hide or show a layer | Click its eye. |
| Rename a layer | Double-click its name, type, press Enter (Esc cancels). |
| Set its opacity | Click the % and type a value, or middle-drag on it (Ctrl slow, Shift fast). |
| Delete layers | Select one or more rows and press Delete. The last layer cannot be deleted. |
Layers cannot be reordered: a new layer always goes on top.
How tools use layers
- New strokes, shapes and text go on the active layer.
- The eraser erases on the active layer only.
- Selection reaches every layer, hidden ones included.
- Delete / Ctrl+Shift+X clears every layer but keeps the layers themselves.
- Within each layer, highlights sit behind ink, and shapes and text sit on top.
Layer changes are not undo steps
Adding, deleting, renaming, hiding and changing the opacity of a layer cannot be undone with Ctrl+Shift+Z. Be sure before you delete a layer.
In class
Put the worked example on Layer 1 and do the class's suggestions on a new layer on top. Hide the top layer to compare, or delete it to start the discussion again — the worked example stays.