Your first picker
Seven steps from an empty canvas to a saved picker that selects controls. Do it once on a rig you do not mind experimenting with, and the rest of the tool will make sense.
Alt+W Edit / Anim Ctrl+N New data A Draw U Bind Ctrl+S Save
Open a rig, then open Am_Picker from the shelf button. You can follow along in the tool's own copy of this list at any time — Window → Quick start help.
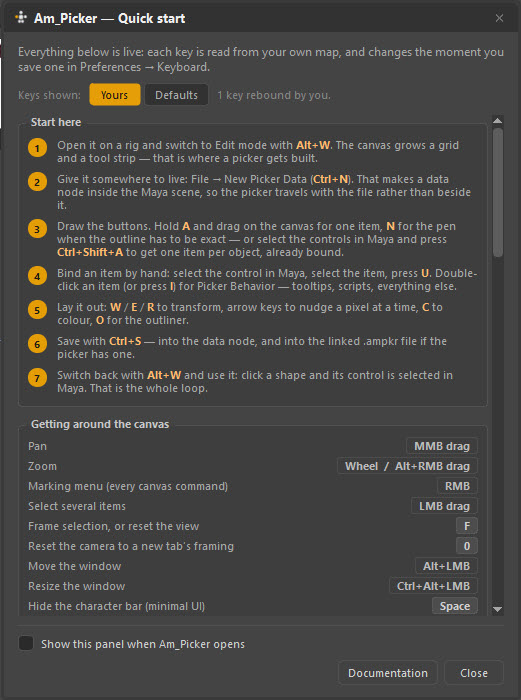
The panel reads every chord from your own keymap, so it stays true if you rebind something. The Yours / Defaults switch at the top shows what changed.
1. Get into Edit mode
Press Alt+W.
The canvas grows a faint grid and a tool strip appears down the left edge, and the corner read-out changes from Anim Mode to Edit Mode. That is the whole signal — the window is otherwise the same window.
Why there are two modes at all
Everything that can change a picker is behind Edit mode. An animator clicking around a face rig for eight hours cannot accidentally drag an eyebrow button two pixels and hand a broken layout to the next person. It also keeps the everyday surface tiny: in Anim mode there is nothing to learn but "click the shape".
2. Give it somewhere to live
File → New Picker Data… (Ctrl+N)
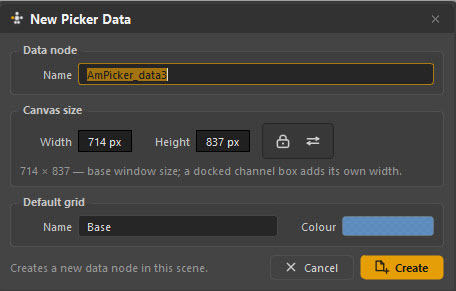
This makes an AmPicker_data1 node inside the Maya scene. The picker is stored
on that node, so it travels inside your .ma / .mb file — reopen the scene
next month and the picker is still there.
| Field | What it is for |
|---|---|
| Name | The node's name. One scene can hold several picker nodes — one per character — and the character bar switches between them. |
| Canvas size | The picker window's base size in pixels. Change it later with Window → Canvas Size…; nothing is baked. |
| Default grid | The name and colour of the first grid, which is what new items mirror and snap against. |
You do not need a file yet
A picker that lives in one scene never needs an .ampkr file. Exporting one
is for sharing a layout between scenes, artists or shots —
see Saving and sharing.
3. Draw the buttons
Three ways, and you will use all of them eventually:
Hold A and drag on the canvas. You get one polygon item where you dragged. This is the fast way to block out a layout.
Quads take rounded corners: 1 off, 2 radius 4, 3 radius 8, 4 radius 16.
Press N and click anchor by anchor, dragging to pull curve handles, the way you would in Illustrator. Use this when the outline has to actually follow the character's artwork.
Full gesture table in Drawing shapes.
Select the controls in Maya, then press Ctrl+Shift+A. You get one item per selected object, already bound to it.
This is the fastest honest start for a body picker: select the whole control rig, get a hundred bound squares, then spend your time arranging rather than binding.
There is also a shape library (Ctrl+Space) of 77 ready-made shapes, and you can generate items from artwork by tracing an image or importing an SVG.
4. Bind an item to a control
If you drew the shape by hand it is not bound to anything yet. To bind it:
- Select the control in Maya.
- Select the item on the canvas.
- Press U.
That is the whole binding. The item now stores that control's name — without its namespace, which is what lets one picker drive any copy of the rig later.
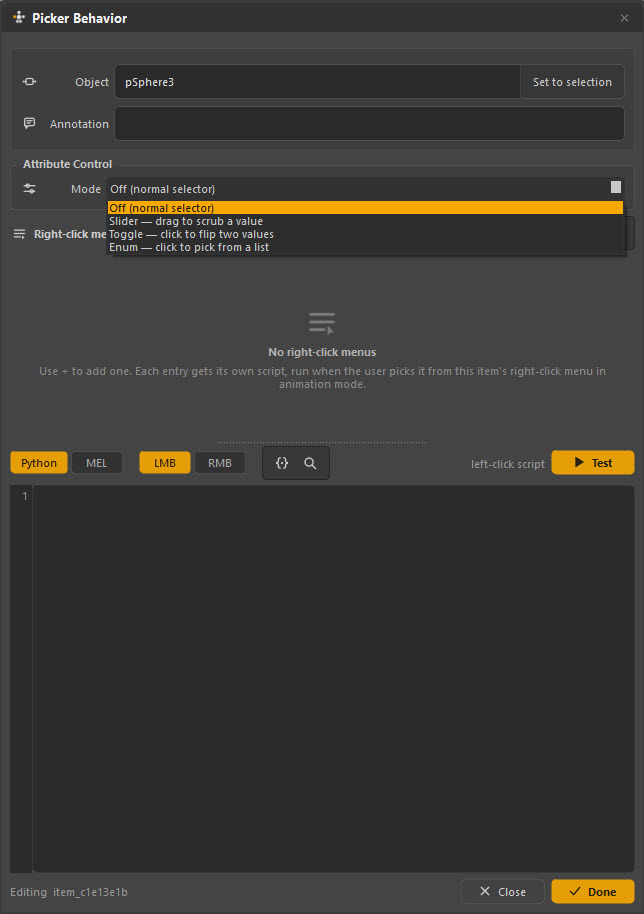
For everything else about an item — a tooltip, several controls at once, a script, a right-click menu — select it and press I to open Picker Behavior.
5. Lay it out
| Key | Does |
|---|---|
| W / E / R | Move / rotate / scale gizmo |
| Arrow keys | Nudge one pixel (Shift = five) |
| C | Set the item's colour |
| O | Picker Outliner — layers, ordering, what is on the canvas |
| ++num-4++ ++num-6++ ++num-8++ ++num-2++ | Align left / right / top / bottom |
| ++num-7++ / ++num-9++ | Mirror the left/right side identifier in names |
Getting around while you work:
| Input | Does |
|---|---|
| MMB drag | Pan |
| Wheel, or Alt + RMB drag | Zoom |
| LMB drag on empty canvas | Marquee-select items |
| RMB | The marking menu — every canvas command |
| F | Frame the selection, or reset the view |
| 0 | Reset the camera to the tab's framing |
| Alt + LMB | Move the window |
| Ctrl+Alt + LMB | Resize the window |
| Space | Hide the character bar — minimal UI |
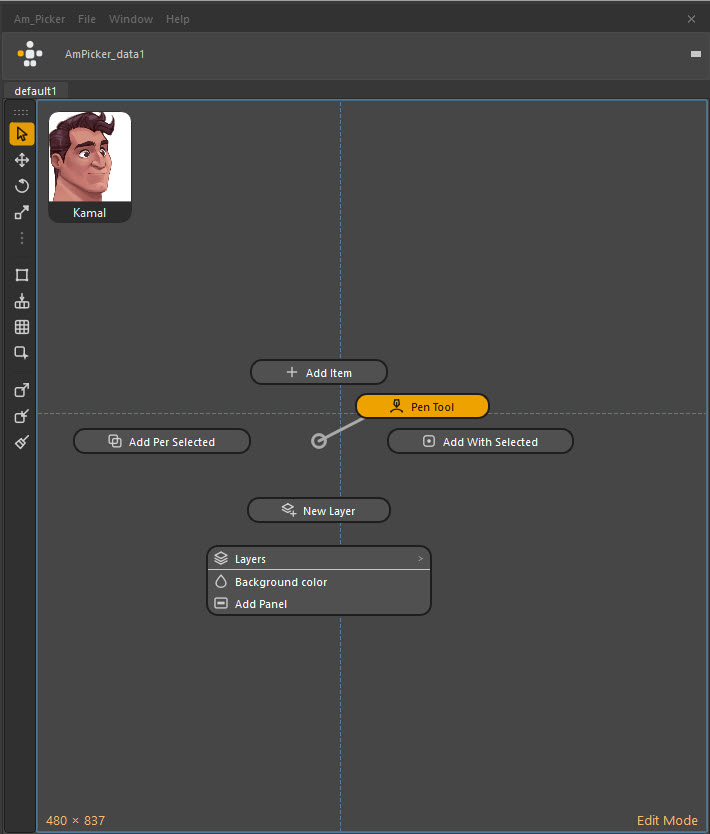
Right-clicking empty canvas in Edit mode. Every command has a marking-menu direction, so once your hand knows the layout you never read this menu again — you just flick.
6. Save
Press Ctrl+S.
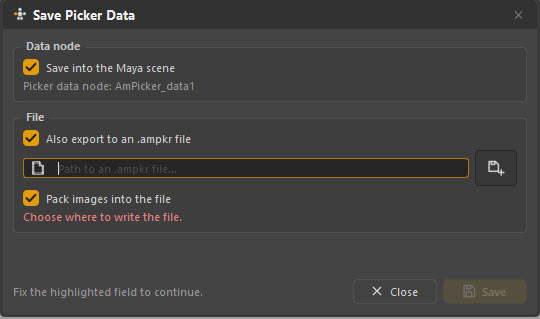
Saving writes the picker into the data node — and, if you tick it, out to an
.ampkr file as well. Pack images into the file makes that file
self-contained, so it still works on a machine that has never seen your
project's artwork.
Saving the picker is not saving the scene
Ctrl+S inside Am_Picker writes the picker onto the Maya node. That node is only on disk once Maya's scene is saved too. Do both before you close.
7. Use it
Press Alt+W to go back to Anim mode, and click a shape. Its control is selected in Maya.
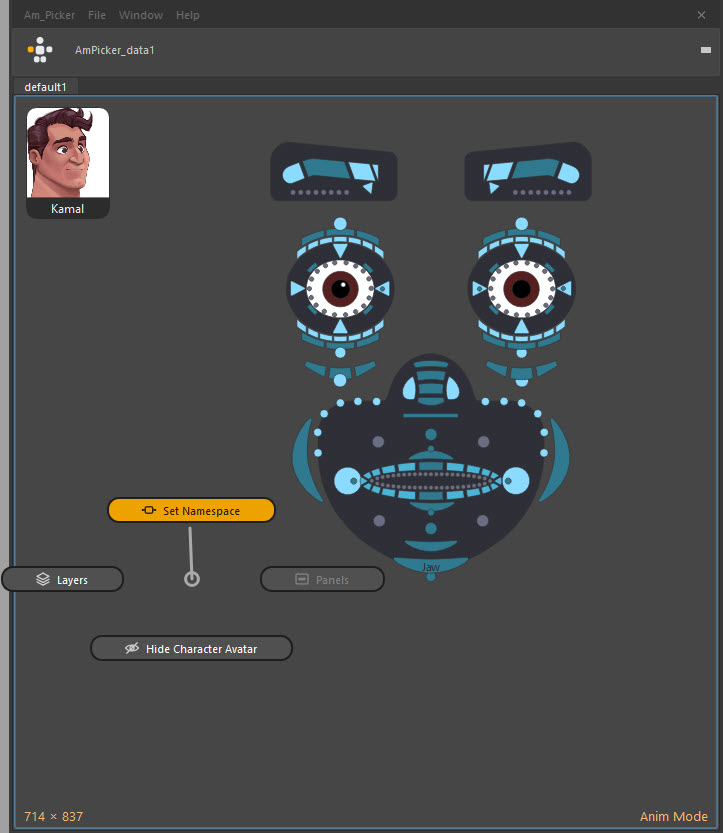
Modifiers work the way Maya's do:
| Click | Selection |
|---|---|
| LMB | Replace |
| Shift + LMB | Toggle |
| Ctrl + LMB | Remove |
| Ctrl+Shift + LMB | Add |
That is the loop. From here:
-
Make it look like the character
Trace the concept art, import an SVG, or drop the model sheet behind the buttons as a background.
-
Hand it to the team
Namespaces, panels, tabs, and the things that make a picker survive contact with a real shot.